Forensics Crime Scene Detective Digital Forensics Guide: Lab Walkthrough and Case Solutions
If there’s one thing that surprised me after spending hours with Forensics: Crime Scene Detective, it’s how little the game cares about holding your hand. Most detective games let you click a button, wait a few seconds, and magically recover every deleted file on a suspect’s computer. That’s not what happens here.
This game expects you to think like an actual forensic examiner. Every mistake has consequences, evidence can become useless because of poor handling, and rushing through a crime scene almost always comes back to haunt you later. Honestly, that’s exactly why the digital forensics side became my favorite part of the entire investigation system.
Instead of feeling like another puzzle game, the laboratory actually makes you work for every breakthrough. The satisfaction of recovering a deleted message after piecing together several clues is far greater than simply clicking an “Analyze” button.
If you’re struggling with damaged devices, encrypted storage, or laboratory workflows, this guide covers everything I wish I knew before tackling the campaign.
Why Digital Evidence Is More Important Than It First Appears
Early cases make digital evidence seem optional. You’ll find fingerprints, blood samples, footprints, and witness statements everywhere, so it’s tempting to ignore a damaged smartphone sitting on the floor.
Don’t.
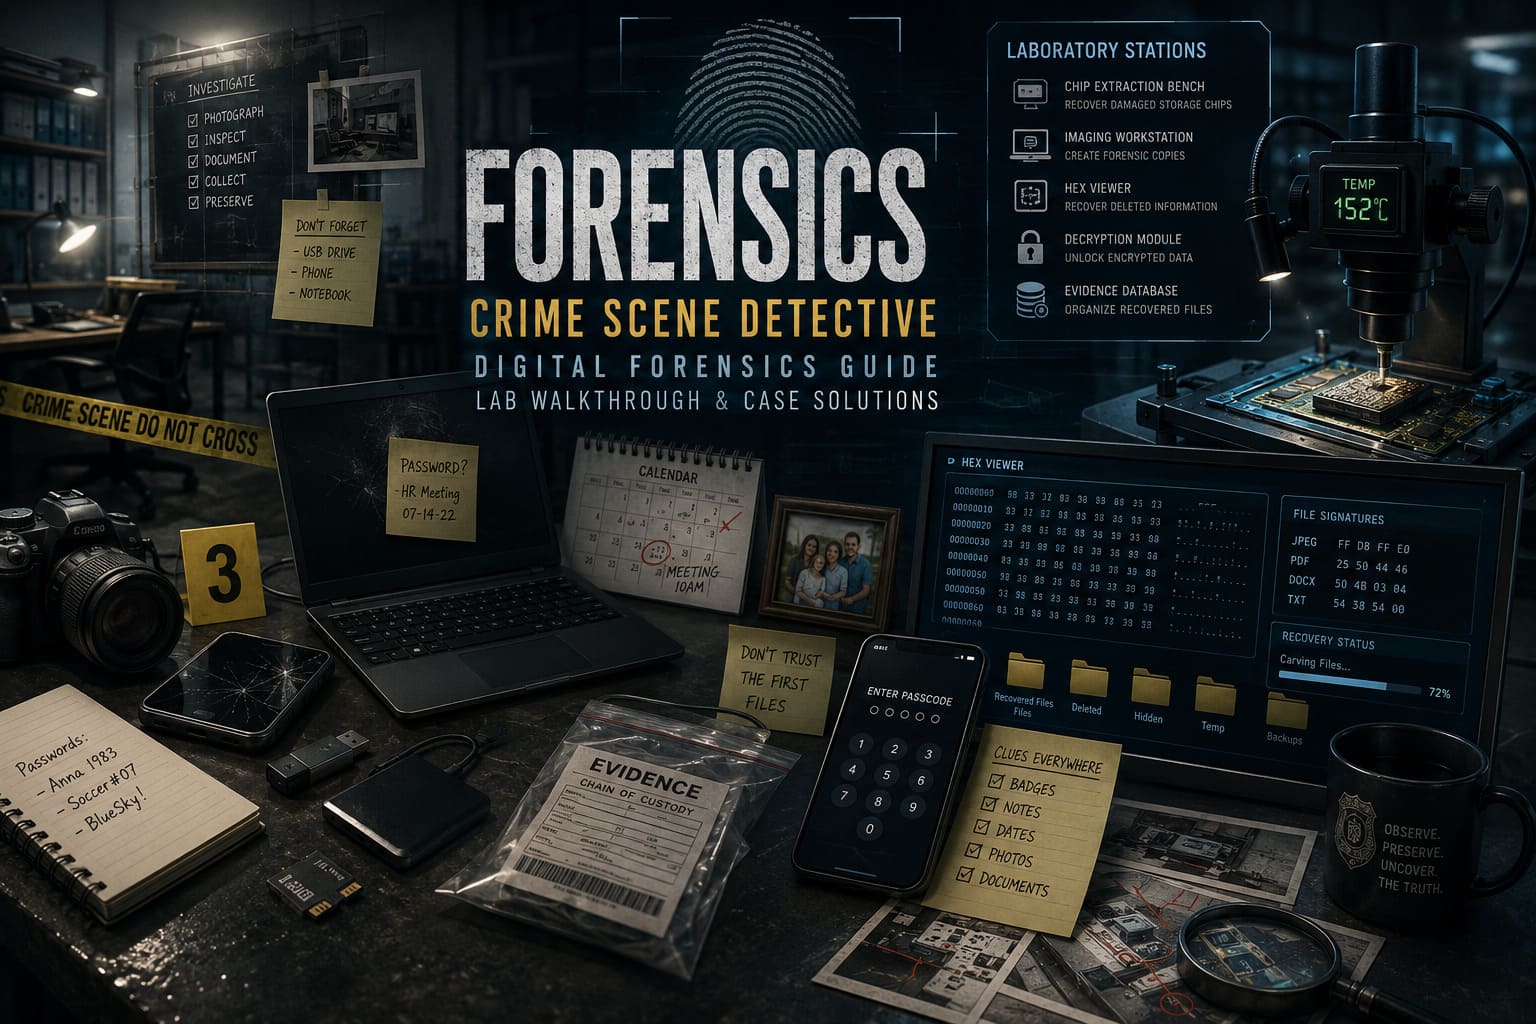
Several investigations hide their most valuable clues inside electronic devices. Sometimes the motive only becomes obvious after recovering deleted conversations. Other times, location history completely changes your suspect timeline.
I’ve even had moments where I believed I already knew the culprit, only to discover hidden phone records proving someone else was lying.
That’s what makes the digital investigation system so satisfying.
Never Rush Through The Crime Scene
One habit the game quickly teaches is slowing down.
Before touching any laptop, phone, USB drive, or memory card, spend a minute simply looking around.
I now follow the same routine every single mission:
- Photograph every electronic device first.
- Inspect surrounding cables and external storage.
- Search for handwritten passwords or notes nearby.
- Label removable media separately.
- Secure active devices before transporting them.
Skipping even one of these steps can leave you searching for missing evidence hours later inside the lab.
Small Details Usually Solve Big Cases
One thing I genuinely appreciate is how environmental storytelling feeds directly into the forensic gameplay.
Sticky notes. Calendars. Desk organizers. Whiteboards. Family photos.
At first they look like decoration.
Later you realize those little details often contain password hints, encryption keys, usernames, or timeline references.
I stopped ignoring office clutter after the second case because it kept saving me from endless password guessing.
Understanding The Digital Laboratory
Once evidence reaches headquarters, the game changes completely.
The crime scene exploration slows down and you’re suddenly working inside a technical laboratory filled with specialized workstations.
Each station has its own purpose.

| Laboratory Station | Primary Function | Best Use |
|---|---|---|
| Chip Extraction Bench | Recover damaged storage chips | Broken electronics |
| Imaging Workstation | Create forensic copies | Working drives and phones |
| Hex Viewer | Recover deleted information | Corrupted or erased storage |
| Decryption Module | Unlock encrypted data | Password protected devices |
| Evidence Database | Organize recovered files | Review investigation progress |
Learning what each station does makes later investigations much easier.
Recovering Data From Damaged Hardware
Broken phones look hopeless at first.
Fortunately, they’re usually recoverable if you stay patient.
The extraction sequence becomes much easier after a few attempts.
Start by stabilizing the motherboard before applying heat.
The temperature gauge deserves your full attention. Heat that’s too low won’t release the storage chip, while overheating permanently destroys important data.
That tiny balance becomes surprisingly tense during later investigations.
Once the chip has been removed successfully, clean it thoroughly before mounting it into the reader.
Only then should you begin extracting raw data.
The first successful recovery feels incredibly rewarding because it isn’t automatic—you actually earned it.
Imaging Drives The Right Way
Creating a forensic image isn’t just another loading screen.
It’s one of the most important parts of preserving evidence.
Always work from an image instead of the original storage whenever possible.
The game rewards careful investigators who preserve metadata and avoid accidental modifications.
I’ve replayed one investigation after realizing I had skipped proper imaging, and the difference in evidence quality was immediately noticeable.
Decryption Isn’t About Guessing Random Passwords
One mistake many new players make is brute-forcing every locked device.
That rarely works.
Instead, treat every password like another clue waiting to be discovered.
Look around the environment.
Pay attention to:
- Employee badges
- Birthday dates
- Office documents
- Personal notebooks
- Whiteboard notes
Many passwords are surprisingly logical once you’ve explored the scene carefully.
This creates a satisfying connection between field investigation and laboratory work.
Learning To Read Deleted Data
The hexadecimal viewer looks intimidating the first time you open it.
Fortunately, you don’t need to become a programmer.
Instead, learn to recognize common file signatures.

| File Type | Typical Signature | Why It Matters |
|---|---|---|
| JPEG | FF D8 FF | Recover deleted images |
| Locate documents | ||
| Text | ASCII Strings | Recover conversations and notes |
Once you identify the beginning and end of a deleted file, reconstruction becomes much easier.
This mechanic quickly became one of my favorite features because recovering evidence feels like solving a real puzzle instead of following objective markers.
Case 1 Walkthrough Tips
The first investigation introduces nearly every mechanic you’ll use later.
Rather than rushing toward obvious evidence, inspect the workspace carefully.
The external USB device connected to the computer deserves immediate attention.
Secure it correctly before removing anything.
Next, examine the damaged smartphone.
Photograph it first.
Only after documenting its condition should you package it for transport.
Inside the laboratory, recover the storage chip carefully and complete the extraction process without overheating the hardware.
After rebuilding the recovered file structure, pay attention to photographs taken earlier during the investigation.
One seemingly unimportant office note eventually provides the information needed to access protected files.
It’s a clever design choice that rewards careful observation rather than random experimentation.
Hidden Evidence Is Usually Hidden For A Reason
One lesson I learned after several investigations is never trusting the first recovered files.
Deleted information often tells a completely different story.
Always spend extra time examining:
- Deleted conversations
- Recently removed photographs
- Backup folders
- Hidden directories
- Temporary files
More than once I discovered evidence that completely changed my suspect list after checking deleted storage.
My Favorite Part Of The Investigation System
What impressed me most isn’t the technology itself.
It’s how every mechanic connects naturally.
Crime scene photography leads to password discovery.
Passwords unlock encrypted drives.
Recovered drives reveal deleted conversations.
Those conversations establish motive.
Everything feels connected.
Nothing exists simply to waste your time.
That level of design makes every successful investigation feel earned.
Palworld 1.0 Full Release Guide: All 47 New Pals, 25 Variants, and Broken Mutation Traits Explained
Tips For Consistently Earning Better Ratings
- Document everything before touching evidence.
- Always create forensic images whenever possible.
- Inspect deleted storage before closing a case.
- Search every room for password clues.
- Handle damaged electronics patiently.
- Review recovered evidence before submitting your final report.
These habits dramatically reduce missed evidence later in the campaign.
Final Thoughts
After dozens of hours, I genuinely think Forensics: Crime Scene Detective delivers one of the strongest digital investigation systems I’ve seen in a video game. It doesn’t rely on flashy Hollywood hacking sequences or instant solutions. Instead, it rewards patience, observation, and careful procedure.
That’s exactly why solving difficult cases feels so satisfying. Every recovered file, decrypted message, and reconstructed timeline is the result of your own work rather than scripted automation. If you embrace the slower pace and treat every investigation like a real forensic examination, the laboratory becomes one of the most engaging parts of the entire game.